Bar
SpaceWire UK
Specialist providers of VHDL Intellectual Property & Design Services
BarBarBarBar
Tutorial
Missing Image!
Part 10 - Deploy 3rd firmware & software projects on Zedboard via JTAG

Introduction

This tutorial details the steps required for using Vitis to deploy an ARM Cortex-A9 firmware & software design on the ZedBoard hardware.

Aims

The aims of this tutorial are as follows :-
  1. Setup hardware
  2. Setup environment
  3. Launch Vitis
  4. Launch MiniCom terminal emulator
  5. Deploy firmware & software on Zedboard
  6. Improvements

1. Setup hardware

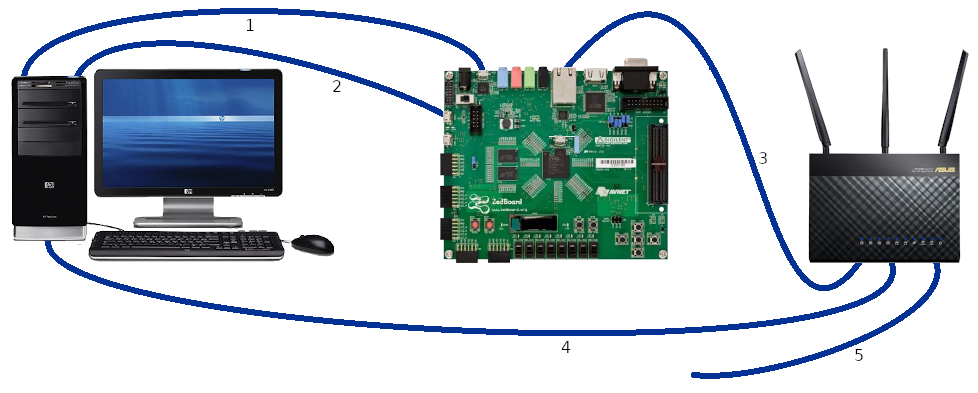
Connect up the hardware as follows :-
  1. Xubuntu PC USB ⇄ Zedboard USB JTAG/Debug
  2. Xubuntu PC USB ⇄ Zedboard USB UART
  3. Zedboard Ethernet ⇄ Router
  4. Xubuntu PC Ethenet ⇄ Router
  5. Router ⇄ Internet
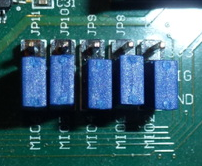
Missing Image! Set the boot mode jumpers on the Zedboard for JTAG. Missing Image!

2. Setup environment

Setup Xilinx design environment for the 2020.2 toolset.
steve@Linux-Steve:/home/steve$ source xilinx.sh
Xilinx tools available tools at /opt/Xilinx :-
1) 2020.2 - Vivado - SDK - Vitis - PetaLinux
0) Exit
Please select tools required or exit : 1

Tools are as follows :-
vivado @ /opt/Xilinx/Vivado/2020.2/bin/vivado
vitis @ /opt/Xilinx/Vitis/2020.2/bin/vitis
petalinux-build @ /opt/Xilinx/PetaLinux/2020.2/tool/tools/common/petalinux/bin/petalinux-build

3. Launch Vitis

Launch Vitis IDE and specify the Workspace to use.
steve@Linux-Steve:/home/steve$ vitis -workspace /home/steve/projects/leds_buttons/sw &

4. Launch MiniCom terminal emulator

Open up a new terminal and launch the MiniCom terminal emulator.
steve@Linux-Steve:/home/steve$ minicom -D /dev/ttyACM0 -b 115200

5. Deploy firmware & software on Zedboard

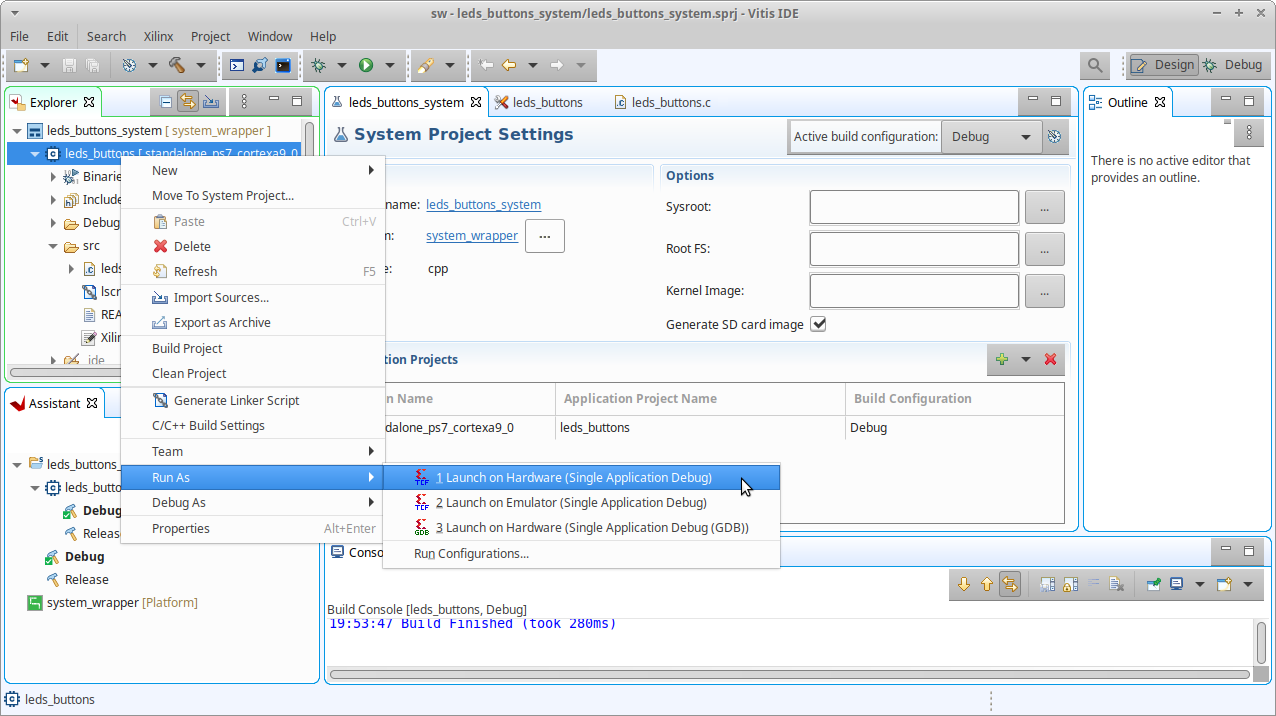
To program the PL & PS part of the Zynq-7000 FPGA right click on leds_buttons under leds_buttons_system inside the Explorer tab and select Run As » Launch on Hardware (Single Application Debug) from the menu. The blue done LED will illuminate once the PL part of the FPGA has been programmed and after this the software will run on the PS part. Missing Image! All being well the Minicom terminal emulator will display the following output from the application.
--== LED & Push Buttons interrupt example ==--

Use the buttons to control the LED's :-

Centre - Reset LED's to 00111100
Left   - Rotate LED's left
Right  - Rotate LED's right
Up     - Increase illuminated LED's
Down   - Decrease illuminated LED's

Press enter key to quit application
6. Improvements

This design can be improved by added debounce logic to the push button inputs as sometimes multiple interrupts are detected for a single button press due to switch bounce. Another improvement would be to make the GPIO2 register latch and hold logic 1's for each of the push buttons when they are pressed, these held values would then be cleared by software after an interrupt is detected and the GPIO2 register read. If there is a large delay between an interrupt being detected and the GPIO2 register being read the users finger will be off the push button so it will not be detected as pressed.